Welcome to Baking it Rich!

Hello, and thank you for viewing my blog! Since I was a child I have always loved baking. So, I thought it would be a great idea to create a place online where I could share recipes, pictures, and tips on baking with other people who enjoy the same thing. Please feel free to look around, comment, share, post, follow (must sign in with gmail) and most importantly, try out some recipes!

Hope to hear from you,

Kaitlyn

Monday, December 31, 2012

Blueberry Crescents!

Blueberry Crescents! 

I made these on Christmas Morning and they were delicious! My dad couldn't keep his hands off of them. They were gone within the hour. You have to try them. You can even mix up the berries and use blackberries, strawberries, pineapple, whatever! ENJOY!

Ingredients

  • 1 package of crescent rolls
  • 1/2 package of cream cheese (full fat, reduced fat, whichever!) at room temperature
  • 2 tablespoons sugar
  • desired amount of berries

Directions


  1. Preheat oven to 375
  2. Unroll crescents onto prepared plan
  3. In a separate bowl, mix together cream cheese and sugar
  4. Spread cream mixture onto crescents evenly
  5. Place desired amount of berries on top of creamed mixture
  6. Fold over the crescents
  7. Bake rolls for amount 10-15 minutes
  8. Enjoy!

Tuesday, October 30, 2012

Banana Bread!

   Banana Bread!!

This recipe is perfect. The bread didn't come out dry, like some breads, or too moist, like others. It didn't crumble when I sliced it. It is absolutely delicious and you're going to want to try it. Banana bread is the perfect quick breakfast, the dough is great for making muffins, and everyone loves it! As long as it is not made with artificial banana flavoring, it should taste great. Enjoy!

Ingredients


  • 3-4 ripe bananas
  • 1/3 c melted butter
  • 1 c sugar
  • 1 egg, beaten
  • 1 tsp vanilla extract
  • 1tsp baking soda
  • a pinch of salt
  • 1 1/2 c white flour
Directions
  1. Preheat oven to 350 degrees.
  2. Smash the ripe bananas in a large bowl and combine with the melted butter.
  3. Mix in the sugar, egg and vanilla.
  4. Mix together the baking soda and salt in a separate small bowl and add in.
  5. Slowly mix in the flour.
  6. Pour into desired, buttered/greased pan.
  7. Bake for 50-60 minutes. 
  8. Be sure to cool on a rack before serving!

Cake!

Did some baking this weekend!

I had a special project this weekend. I had my mom help me because she used to decorate cakes. I did the baking, she did the decorating. I really need her to teach me the ropes....


Monday, October 8, 2012

Snickerdoodles!

Snickerdoodles--A classic.

Snickerdoodles will always be a classic recipe. I'm not a big fan of crunchy, rock-hard cookies. That's why I love these Snickerdoodles. They are light and chewy, just like every cookie should be. One cookie is the perfect amount of sugary sweetness to get you through the afternoon. If it's been a rough day, then go ahead and take another. They are a great comfort food, so I'm sharing this recipe to keep your spirits high!

Ingredients

  • 1/2 cup butter, softened at room temperature
  • 1/2 cup vegetable shortening, or substitute another 1/2 cup butter
  • 1 1/2 cups white sugar
  • 2 large eggs
  • 2 teaspoons vanilla
  • 2 3/4 cups flour
  • 2 teaspoons cream of tartar
  • 1 teaspoon baking soda
  • 1/4 teaspoon salt
  • 1/3 cup sugar
  • 1 tablespoon cinnamon

Directions

  1. Preheat oven to 350.
  2. Cream together the butter, shortening and sugar. Then beat in the eggs and vanilla.
  3. In a separate bowl, combine the flour, cream of tartar, baking soda, and salt. Mix into the butter mixture.
  4. On a small plate or in a small bowl mix the remaining sugar and cinnamon. Use your hands to shape balls of dough and roll in the cinnamon sugar. Use extra flour as needed.
  5. Place on a greased baking sheet and bake for about 8-10 minutes. Grab some milk and enjoy!

Chocolate Cobbler?!

Chocolate Cobbler!

Okay, every person I have mentioned "Chocolate Cobbler" to has been ridiculously confused. "Does that even exist?" The answer is yes, it does! And It's absolutely to die for. This was gone within 24 hours of making it. Once you have one piece you have to go back for a second. It is the perfect afternoon delight. I would suggest eating it with tea, coffee, or milk. But, there is coffee in the recipe! It is an overload of gooey goodness that you can't miss out on!

Ingredients

  • 1 cup flour
  • 2 tsp baking powder
  • 1/4 tsp salt
  • 7 tbsp cocoa powder, divided
  • 1 1/4 sugar, divided
  • 1/2 cup milk
  • 1/3 cup melted butter
  • 1 1/2 tsp vanilla
  • 1/2 cup brown sugar
  • 1 1/2 cup hot coffee

Directions


  1. Preheat oven to 350 degrees
  2. Mix together flour, baking powder, salt, 3 tbsp cocoa, and 3/4 cup sugar.
  3. Stir in the milk, melted butter, and vanilla. Mix until it is smooth.
  4. Pour into a buttered 8x8 or 9x9 inch pan.
  5. In another bowl, mix the remaining sugar, brown sugar, and cocoa. Sprinkle this evenly over the batter.
  6. Pour the coffee onto the top of everything and DO NOT MIX.
  7. Bake for about 40 minutes. Enjoy with some ice cream, cool whip, or whipped cream!

Seasoned, Buttered Pasta and Garlic Bread!

Seasoned, Buttered Pasta and Garlic Bread!

Everyone loves a home-cooked meal, especially when the whole family gets together! I usually do the cooking when I am home with the family, and this past weekend I made something I had never tried before. Usually when I make pasta I make the generic spaghetti with meat sauce, but I decided to try something different. It is so simple, and you can make the garlic bread while the pasta is cooking. You're family will love it!


Ingredients

  • 1 box cooked rotini
  • 1/4 cup melted butter
  • 1/8 cup olive oil
  • 1/2 tsp sea salt
  • 1/2 tsp pepper
  • 2 tsp Garlic powder
  • 1 tsp oregano
  • 1/2 tsp parsley flakes
  • Meatballs--homemade or frozen (optional)

Ingredients for Garlic Bread

  • 1 loaf french bread
  • Butter
  • A few tsp of Olive oil
  • Dash of Sea Salt
  • Dash of Pepper
  • Garlic Powder
  • 1/4 cup of mozerella cheese

Directions

  1. Thoroughly cook the rotini in a large pot.
  2. After it is drained put it back in the pot and mix in the butter, olive oil, salt, and pepper.
  3. Combine the garlic powder, oregano, and parsley in a separate small bowl before stirring it in as well.
  4. Cook any meatballs that you would like to add to your pasta. Also feel free to add chicken, tuna, onions, or whatever you feel like!

Directions for Bread

  1. Slice the loaf into the desired size and spread each piece with butter. (This will melt in the oven)
  2. With a spoon, put a few drops of olive oil on each slice, being careful not to drown the bread!
  3. Sprinkle each piece with salt, pepper, and garlic powder to taste.
  4. Evenly distribute the cheese onto each slice of bread.
  5. Bake at 400 degrees for about 10-12 minutes, depending on the size of the bread. It should be toasted when you remove from the oven.

Monday, October 1, 2012

The Most Delicious Frosting You'll Ever Have


Chocolate Frosting

I don't know what your favorite type of frosting is, but I can almost guarantee you will love this recipe. It is very quick and easy. The best part, besides the taste, is that it uses white sugar instead of powdered sugar! I almost never have powdered sugar in my house, unless I plan on making puppy chow sometime soon, but with this recipe you won't have to worry about making a trip to the store! In my photos, I put the frosting on before it was completely cooled, so it become a drizzly sauce, which is what I was going for anyways ;) But if you would like a more solid and thick texture, let it cool a bit longer. 

Ingredients

  • 1 cup of granulated sugar
  • 1/2 cup unsweetened cocoa
  • 1/4 cup milk
  • 1/4 cup butter
  • 1 tsp vanilla extract

Directions

  1. In a medium saucepan, stir all ingredients together and bring to a boil. 
  2. Remove from heat and beat until the mixture thickens.
  3. After it has cooled, spread it on a cake, make a cookie sandwich  use it as dip for pretzels, or whatever your heart desires!

Monday, September 17, 2012

Delicious Chocolate Peanut Butter Granola Bars!


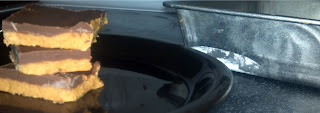
I wasn't sure what to expect with this recipe, but I was very pleased! It's alittle like the No Bake Cookie recipe that I posted awhile ago, but in a layered form, and much easier. These cookie bars would also make a delicious, and somewhat healthy breakfast. But I can't promise they're super healthy. I set them out on the counter at my parent's house and they were gone by the end of the day. 

They really are a yummy snack. Try it out, mix it up, change some ingredients if you like, and let me know how it works out!

Ingredients


  • 3/4 cup butter
  • 1/2 cup packed brown sugar
  • 1 tsp vanilla
  • 3 cups cooking oats
  • 1 cup your choice of chocolate chips (I used semi-sweet)
  • 1/2 cup peanut butter

Directions

  1. Melt the butter in a medium sauce pan on low heat. Then, slowly add the brown sugar, vanilla, and oats. Cook for 3 minutes while stirring. 
  2. Butter or grease an 8x8 pan and press a little over half of the oatmeal mixture into the bottom. 
  3. In a glass bowl, microwave the chocolate and peanut butter together. Take out and stir about every 20-30 seconds. Pour this over the oatmeal crust.
  4. With the remaining oat mixture, sprinkle it over the top. If you have left over chocolate you can drizzle that over the top as well.
  5. Refrigerate until firm and enjoy!

Monday, September 3, 2012

Chocolate X2 Cookies!

Chocolate X2 Cookies!


Hey everyone! I just moved back into my college dorm, so I haven't been able to bake too many things recently. However, I saved some time to make these delicious cookies! They are a little like making brownie cookies, if that makes any sense at all. They are dense, soft, and very chocolate-y. I'm a big chocolate fan, if you haven't noticed from my previous recipes, so this is the perfect treat.

Ingredients

  • 1 1/2 cups light brown sugar
  • 2/3 cup vegetable shortening
  • 1 tbsp water
  • 1 tsp vanilla
  • 2 eggs
  • 1 1/2 cups all-purpose flour
  • 1/3 cup cocoa
  • 1/2 tsp. salt
  • 1/4 tsp. baking soda
  • 2 cups semi-sweet baking chips

Directions

  1. Heat oven to 375 degrees.
  2. Combine brown sugar, shortening, water, and vanilla until creamed and well blended. Beat eggs into the creamed mixture.
  3. In a separate bowl, combine flour, cocoa, salt, and baking soda. Slowly mix into creamed mixture.
  4. Add chocolate chips.
  5. Drop or shape dough on greased cookie sheet.
  6. Bake for about 10 minutes.
  7. Cool and enjoy!

Wednesday, August 15, 2012

Peanut Butter and Fudge Frosting


Peanut Butter and Fudge Frosting!


I love peanut butter and of course, love fudge as well. If you feel the same way then you can't go wrong with this great frosting recipe! I used it to frost my "Not-So-Bad-For-You Brownies", but you can use it on cake, cookies, or whatever you wish! It turns out a little stiff, so I added a small amount of milk and more peanut butter for extra flavor, but that is completely up to you. Get creative!


Ingredients


    • 1/2 c. peanut butter
    • 1/3 c. unsweetened cocoa
    • 2 2/3 c. confectioners' sugar
    • 1/4 tsp. salt
        • 1 tsp. vanilla
    • 1/2 c. cream or evaporated milk

    Directions

  1. Cream together the peanut butter and cocoa. 
  2. Add the rest of the ingredients, except the cream.
  3. Slowly add in cream.
  4. Spread and serve!

Not-So-Bad-For-You Brownies

Yes, you read the title correctly. These brownies are surprisingly better for you than most other brownies. Here is the secret, you use applesauce instead of oil. Yes, it sounds a little weird, maybe even gross. Trust me, you won't regret it once you try it! You can't even taste the applesauce. The best part is that the brownies turn out more dense, and not like a cake. (That's how I love my brownies!) If you love brownies as much as I do, and they are sabotaging your diet then give this a try! The only problem I found is that I didn't use a leavening agent (baking soda or powder), next time I try it I will see what happens when I add that in, otherwise they turned out great!!

Ingredients


  • 1 cup(s) (6 oz) semisweet chocolate chips


  • 1/2 stick(s) (1⁄4 cup) unsalted butter, cut up


  • 1 cup(s) packed light-brown sugar


  • 1 cup(s) unsweetened applesauce


  • 4 large egg whites


  • 1 cup(s) white whole-wheat flour


  • 1/4 cup(s) unsweetened cocoa


  • 1/2 teaspoon(s) salt

  • Directions 

    1. Preheat oven to 350 degrees. 
    2. Melt together the chocolate chips and butter in a bowl in the microwave or in a small pan on the stove until smooth.
    3. Beat in sugar, applesauce and eggs.
    4. Stir in flour, cocoa, and salt until well blended.
    5. Pour into a greased 13x9 pan.
    6. Bake for about 20 minutes then cool on a wire rack.
    7. Serve!

    Tuesday, August 7, 2012

    Chocolate Pound Cake!

    Chocolate Pound Cake!


    If you like pound cake, then you must try this! It's not too sweet, so it is just perfect for an after-dinner dessert or a light snack. You can take this recipe and make it in a 13x9 dish, bundt cake dish, muffin cups, or small loaf pans. I used a regular, non-fluted bundt cake pan. Any way you want to make it, it still tastes just as good! 


    Ingredients

    • 1/4 cup shortening
    • 2 sticks of softened butter
    • 3 cups sugar
    • 5 eggs
    • 3 cups all-purpose flour
    • 1/2 cup cocoa
    • 1 tsp. baking powder
    • 1 cup buttermilk
    • 2 tsp. vanilla extract

    Directions

    1. Preheat oven to 350 degrees.
    2. Cream together the shortening, butter and sugar, until light and fluffy.
    3. Beat in eggs, one at a time.
    4. In a small bowl, sift together the cocoa, flour, and baking powder.
    5. Mix together buttermilk and vanilla in a small bowl and mix into the shortening mixture. 
    6. Slowly, by thirds, add in the flour mixture.
    7. Make sure it is well blended and pour into a greased pan.
    8. Bake for about 1 hour and 10 minutes. 
    9. Serve any way you like it! Enjoy!

    Tuesday, July 31, 2012

    Reese's Stuffed Cupcakes!

    Reese's Stuffed Cupcakes!


    This is a recipe I came up with at last minute for my brother's birthday party. He loves Reese's peanut butter cups and cupcakes, so I thought, why not put them together? It can't possibly taste bad! Sure enough, they were delicious. The kids loved them. I also added a little bit of peanut butter to the frosting to create a more peanut buttery taste. But that is entirely up to you! Enjoy!

    Ingredients


    • Your choice of cake mix (in my experience chocolate works best)
      • You will also need all the ingredients to prepare your mix. Eggs, water, oil, etc.
    • 12 unwrapped Mini Reese's peanut butter cups
    • Your choice of frosting (again, in my experience chocolate frosting has worked best)

    Directions

    1. Preheat oven to 350.
    2. Prepare cake mix as instructed.
    3. After greasing a cupcake pan, fill each cup about 1/4 full. 
    4. Make sure the peanut butter cups are free of any wrappers and lightly push them into the mix. Do not push them all the way to the bottom of the pan.
    5. Use the rest of the mix to cover each of the peanut butter cups all the way.
    6. Bake for about 25-30 minutes (depending on which mix you have)
    7. Cool the cupcakes thoroughly, frost, and serve!


    Wednesday, July 11, 2012

    Mini Peanut Butter Pies!

    Peanut Butter Pie!


    If you love Peanut Butter, then you probably love peanut butter pie as well. It is thick, rich, and delicious. This recipe is a lighter recipe, using cool whip instead of whipping cream. You are welcome to use a light cream cheese. You can also use light chocolate syrup if you would like to decorate them! Enjoy!

    Ingredients


    • 1 (8 ounce) package cream cheese, softened
    • 1 1/2 cups peanut butter
    • 1/2 cup of chocolate chips, melted
    • 2 (8 ounce) containers frozen whipped topping, thawed
    • 1 (9 inch) graham cracker crust (homemade or store bought) (I used 12 small homemade graham cracker crusts in a cupcake pan)

    Directions

    1. In a large bowl, beat together the cream cheese and sugar until smooth.
    2. Beat in the peanut butter and melted chocolate. 
    3. Fold in one container of whipped topping.
    4. Pour into crust(s) and top with the other container of whipped topping.
    5. Decorate with whatever you want!
    6. Refrigerate about 2 hours before serving.


    Friday, June 22, 2012

    Texas Sheet Cake!

    Texas Sheet Cake!

    Texas Sheet Cake is a classic recipe. It is often mistaken for brownies, but indeed it is very different! Brownies are more most and condensed, whereas cake is more fluffy. You definitely should not pass up this recipe. It is very delicious. I have never been a huge fan of Texas Sheet Cake, but this one changed it all! 

    Also, this recipe was actually first made by my mom's good friend, Brand Parcel. My mom liked it so much that she had to ask for the recipe. She made it a few times, and now it's my turn to give it a shot! I just made it today and it's already half eaten. Try it! 

    Ingredients for cake

    • 2 c. flour
    • 1/4 tsp. salt
    • 2 c. sugar
    • 1/2 c. buttermilk
    • 2 eggs
    • 1 tsp. vanilla
    • 1 tsp. baking soda
    • 1 stick butter
    • 1/2 c. shortening
    • 1 c. water
    • 4 tbsp. cocoa

    Ingredients for icing

    • 1 stick butter
    • 4 tbsp. cocoa
    • 6 tbsp. buttermilk
    • 1 lb. powdered suagr
    • 1 c. pecans or walnuts chopped
    • 1 tsp. vanilla

    Directions

    1. In a large bowl, sift together the flour, salt, and sugar. 
    2. In a separate bowl, mix together the buttermilk, eggs, vanilla, and baking soda.
    3. In a small saucepan, bring the butter, shortening, water, and cocoa to a boil.
    4. After it begins to boil, pour over the flour mixture and mix well.
    5. Add in the buttermilk mixture.
    6. Grease and flour (I use sugar instead of flour) a sheet pan. 
    7. Bake at 350 degrees for 20-25 minutes.
    8. As the cake is baking, you will need to mix together the icing because it is put on the cake as they are both warm. So, melt the butter, cocoa, and milk in a saucepan. 
    9. Bring it to a boil, stirring constantly. 
    10. Remove from heat and mix in the powdered sugar, nuts, and vanilla.
    11. Spread on the cake right after it is removed from the oven! Cool and serve.

    Saturday, June 16, 2012

    Cranberry Cupcakes

    Cranberry Cupcakes!


    These cupcakes are delicious. I was a bit skeptical about trying this recipe, but if you mix the right soda and cake mix together it is heavenly. I also completely changed the recipe, so in my opinion it tastes a lot better. It doesn't taste low calorie, but it is! I made mini cupcakes and each has 51 calories. For Larger cupcakes it would have roughly 100 calories. Either way, that is a really good deal! There is no oil in this recipe, just diet soda and cake mix! If you are wondering why you would ever mix the two....just try it....you won't regret it.


    Ingredients

    • 1 box white cake mix (or really whatever cake mix you would like)
    • 10 oz Diet Cranberry Sierra Mix (or whatever diet soda you would like! Or regular soda works too but keep in mind the calorie count will be different.
    • 1 egg

    Directions


    1. Mix all ingredients together thoroughly.
    2. Pour into baking cups.
    3. Bake at 350 degrees for about 15-20 minutes!

    Wednesday, June 6, 2012

    Chocolate Truffles!

    Chocolate Truffles! 

    This was my first time making truffles, and they turned out better than I expected. I had to share it with you! I didn't believe that this recipe would be easy, but it was. Do not be fooled by the fancy appearance, they are simple. Get creative with the coating that you choose. Try cocoa, granulated sugar, chopped nuts, powdered sugar, or even try dipping it in melted chocolate. I highly recommend this recipe for anyone who wants to try something new. 


    Ingredients
    • 3/4  c. unsalted Butter
    • 3/4 c. unsweetened cocoa powder
    • 1 14 oz. can sweetened condensed milk
    • 1 tbsp. vanilla
    • extra cocoa or powdered sugar for coating

    Directions


    1. Melt butter in a medium saucepan on low heat.
    2. Slowly add in the cocoa powder until the mixture is smooth.
    3. Add the sweetened condensed milk and stir constantly on medium heat until it has reached a pudding like consistency (about 3-4 minutes)
    4. Remove from heat and add the vanilla
    5. Cover the pan and place in the refrigerator for 3-4 hours.
    6. Remove from refrigerator and roll into 1 inch ball. Roll truffle in desired coating (nuts, cocoa, powdered sugar, etc.)
    7. Chill for another 2 hours and serve!

    Friday, June 1, 2012

    Reese's Peanut Butter Bars!

    Reese's Peanut Butter Bars! 

    If you love peanut butter, then this recipe is for you! I am going through a peanut butter phase right now, and I think my family is getting pretty sick of it. If you choose to try this, use Peter Pan Peanut butter. It is my absolute favorite. I also love organic peanut butter, but I can't say that I have tried that in this particular recipe. 


    Ingredients

    • 1/2 c. melted butter
    • 1 c. graham cracker crumbs.
    • 1 c. powdered sugar
    • 1/2 c. + 2 tbsp. peanut butter
    • 3/4 c. chocolate chips (either milk or semi-sweet)

    Directions


    1. In a medium bowl. mix together the first 3 ingredients plus 1/2 c. peanut butter.
    2. Press evenly into an 8x8 square pan.
    3. In a separate bowl or on the stove, melt together the remaining peanut butter and the chocolate chips.
    4. Spread the melted chocolate on top of the peanut butter mixture evenly.
    5. Cool in a fridge or freezer for approximately 1 hour.
    6. Cut and serve!

    Monday, May 28, 2012

    No Bake Cookies!


    No Bake Cookies!

    Darius is a big fan of no bake cookies!

    These cookies are some of my favorites. They never last more than two days in my house. It is so tempting to eat the dough as your scooping it out on the pan. Don't miss out! Try this recipe! You can also try it without the peanut butter if you're aren't a peanut butter fan, or you can try it without the cocoa. You can also substitute dry cereal in for the oats if you are running low on quick oats. Don't be afraid to doctor up the recipe to accommodate! 


    Ingredients

    • 1/2 c. milk
    • 1/2 stick of butter
    • 2 c. granulated sugar
    • 4 tbsp. unsweetened cocoa
    • 1/2 c. peanut butter (I'm a big fan of organic or Peter Pan peanut butter)
    • pinch of salt
    • 1 tsp. vanilla
    • 3 c. quick oats

    Directions

    1. In a big saucepan, mix together the milk, butter, sugar, and cocoa.
    2. Cook on medium heat for 2 minutes, stirring constantly.
    3. Remove from heat and add in the last 4 ingredients until oats are fully coated.
    4. Drop onto a pan covered in wax paper. 
    5. Let them set for about an hour.

    Sunday, May 27, 2012

    Creamy Macaroni Salad!

    Creamy Macaroni Salad!


    This is one of the best macaroni salad recipes I have ever tried (aside from Amish macaroni salad). Macaroni salad is a great side dish to take to a picnic or potluck. It isn't too sour, sweet, and salty. The vegetables add the perfect crunch to the creamy macaroni noodles. Try this recipe with a different type of noodle such as Rotini. You could also switch up the veggies if you get tired of the celery and pepper mixture. I enjoy adding green and orange peppers in addition to the red peppers. 

    Ingredients

    • 1 c. mayo
    • 2 tbsp. vinegar
    • 1 tbsp. prepared mustard
    • 1 tsp. sugar
    • 1 tsp. salt
    • 1/4 tsp. black pepper
    • 8 oz. cooked and cooled macaroni
    • 1 c. chopped celery
    • 1 c. chopped red pepper
    • 1/4 c. chopped onion

    Directions

    My cousin Ryan had a few helpings of this recipe. He loved it!
    1. In a large bowl, mix together the mayo, vinegar, mustard, sugar, salt, and pepper.
    2. Make sure the macaroni is cooled. Add the macaroni and vegetables to the mayo mixture.
    3. Mix until all noodles are coated thoroughly. 
    4. Serve and enjoy!